Monday, February 11, 2013

Pony Bead Bowl

This is a really fun craft to do with kids.. or not :)  This can also be modified to make Christmas ornaments, jewelry, etc.  This was the first time I had attempted the bowl.  It's fairly easy.

What you'll need

Pony beads
Aluminum foil
Round cake pan
An oven-safe dish
 
Step 1

Line the bottom of a cake pan with aluminum foil.  Pour pony beads in the pan until they fully cover the bottom of the pan.

Step 2

Put the pan in the oven at 400 degrees for 30 minutes (or until melted).

Step 3

Let cool and remove the foil.  Take disk (it can still be slightly warm..) and place over a foil-covered dish.  Place dish with the pony bead disk on top on a cookie sheet (or back in cake pan) and place back into oven.  

Step 4

As the beads melt again they will droop over the bowl.  When it has formed to your liking, remove and let cool. 

Ta-da!

Friday, February 8, 2013

Beautiful Metal Art

I saw this idea on Make It.. a Wonderful Life  but wanted to try it with canvas boards (I much prefer them to cardboard), and using far less steps.. The original poster did this with a children's art class. They drew their pictures on paper, traced it onto tracing paper with ink, then covered the other side with graphite and then traced onto the cardboard. This is a great technique to use, but I just don't have that kind of patience...

What you need

A canvas board (or cardboard)
Tacky glue (other glues will not work)
A glue stick
Something with a dull point (I used the end of a paintbrush)
Shoe polish (I used a sponge applicator one)

Step 1

Make a design on your board or other surface with the glue. ( I like doing it this way because you end up with maybe some crazy unanticipated design that you will love.) Let glue dry overnight.


Step 2

Glue needs to be fully dry. Cut your aluminum foil to size (with a border to fold over - about an inch or two). Cover one side (either) with the glue stick.

Step 3

Press the foil over your design. Push in the edges with your fingers, lightly (you don't want it to tear). After you have smoothed most of the bubbles out, fold your edges over the sides.
Take your dull point and press down around your design. Try to push the excess out. Make designs in the flat foil (this will catch some of the shoe polish later and make your design more detailed).


Step 5

Apply ample shoe polish all over your design. After a few seconds, wipe off as much as possible with a paper towel.


Ta-da!


Thursday, February 7, 2013

Negative Watercolor on Canvas

A modification of a technique I saw on another blog.. I wondered if this technique would work with canvas an using a hair dryer between coats.. Only one way to find out...

You will need

Painters tape
Rubber cement (I prefer "Best-Test")
A canvas board (or canvas paper,etc)
Watercolors
Brush(es)
Water

Step 1

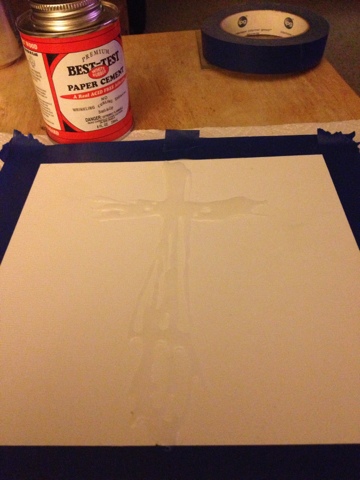
Tape around your project surface. (If using any type of paper, tape to a painting board, clip board, or another hard surface)


Step 2

Drip the rubber cement around your surface to make a design (or not- if you want an abstract painting).


Step 3

Dry with hair dryer (or let dry overnight). The rubber cement may bubble.. Just keep drying it..

Step 4

When COMPLETELY dry, paint over glue design with watercolors. Tip: if you wet the entire surface with water first, you can drip color and get neat effects. Paint until you have a picture you are happy with.. Dry with hair dryer (or let air-dry).

Repeat step 4 (WITHOUT removing glue) as many times as you'd like. This will result in a layered multi-colored result.


Step 5

When everything is fully dry, slowly roll off the glue and peel off your tape.


Ta-da!


Tips:

You can trace around your lines (from the glue) with a pen or thin marker to make them stand out.

Write a quote or favorite saying on your finished painting with a marker or pen.